Showing posts sorted by relevance for query apartment. Sort by date Show all posts

Monday, November 28, 2016

DIY: Framing for the New Floor Plan - Building an In-law Apartment From Scratch


This part of the construction was the first big milestone. We pulled down every existing interior wall and did a final clean up (and another trip to the dump). Staring at a hollow shell was a little intimidating. This was the first (only, and last) point where Mr. Steady almost waivered. He looked around and said, "I guess we're building an apartment now."  It was also the first (of many) point where I almost lost it.  I burst into uncontrollable laughter - much like Tom Hanks in the movie Money Pit and threw my hands up. "Yep. Guess we're building an apartment."
 
 We started with a really precise floor plan. All the measurements had been adjusted on the Sweet Home 3D program after demo (More about that HERE). So, we printed the new layout and used it to mark out the new wall locations on the subfloor.
 
All there was left to do was put the new walls up! 
 
Enter: This little beauty...
 
This compressor has been a loyal friend to Mr. Steady through these renovation years. It is made by Porter Cable and we can testify to it's durability! It comes with a brad nailer, a finish nailer, and a staple gun. They have all been used and abused around here and are still going strong!  He uses them in the shop for product builds, in the house for trimwork....and when we started this project he purchased this other little beauty...


A framing nailer- this blessing was absent from our previous projects (all still in progress) and Mr. Steady said by comparison, it felt like these walls practically put themselves up. I'm sure it's all relative, but he had the whole apartment done in a day!


And just like that, it had rooms again!
We called our electrician in and he ran a subpanel off our main electrical panel (its wired for future independence, but we didn't have the budget to run a separate line now) . He also ran all the wiring for the outlets, switches, and recessed lighting (a necessity with 7,10" ceilings).
 
Progress!
 
 
Progress!
 
 
Progress!
 
 
Then we paused from celebration to purchase insulation - A huge expense we were not planning on. Thankfully, Mr. Steady has a great relationship with the folks at the local lumberyard and we got "a deal". 
 
 
The insulation was stapled in to each cavity (Cha-ching. Cha-ching. Cha-ching...) with the Porter Cable staple gun.  We were feeling productive and accomplished. We were starting to come to grips with the necessary expenses and were proud of the progress we made....

 
Then we took a look around.
 
 
Our shoulders drooped as we asked, "Why does it look just as bad as it did a few weeks ago?" 
And so goes the story of renovation.

This part of the process (the behind the walls part) was NEVER ENDING.  It's never fun spending money on things you will NEVER see. It's even less fun spending hours, days, and weeks putting them there yourself.  I hate to admit it, especially this early in the process, but with the thought of plumbing, gas lines, and other  "behind the scenes projects", I was already burnt out. Shameful, I know.


A possible contribution to my lack of perseverance was this little gal - still waking up several times a night to eat.  Not making excuses....it's just a thought.
 
In the end, we did make one framing adjustment - a pass-through from the kitchen to the living room.  It let in a ton of light and we figured it would give my Mother in law a great view from the sink.


Ta-da!


Well, it sure is weird being on this side of the project and looking back. I was so SURE it would never end.  Let this be a dose of hope for you. It DOES end. It WILL be awesome. You CAN do it.
 
Please leave your comments, questions, and thoughts below. Love to hear from you!

THE BEGINING
THE DEMOLITION
 
Don't miss the next installment of the In-Law Apartment series....Subscribe HERE or in the top right hand side of your screen - just below the stunning photo of your favorite author! =)

From our home to yours,
Katie


This post contains affiliate links.
To learn more, please click here.

Friday, November 25, 2016

DIY: Demolition - Building an In-Law Apartment From Scratch

 
 After a winter's worth of brainstorming and designing, we finally created a new floor plan on Sweet Home 3D that we were ready to move forward with (more about that HERE). 
We waited for the weather to promise a steady warmth (and our tax return to arrive) and we packed up my in-laws (again!) and moved them out of the East Wing and in to the converted sun porch.
 
 
 We promised to complete their apartment before the season turned again. It gets MIGHTY cold in the porch room. (We took our turn out there during my second and third trimester).
 
Needless to say, we didn't have any time to waste.  We grabbed our hammers and geared up for Demo Day!
Everybody works around here - no matter how small or how bald.


We started with the easy stuff - shelves, doors, window treatments...
 

Then we let loose on a few walls...


 The place came apart on its own in some areas...and we found lots of surprises:

 
Surprise - the ceiling tiles are cardboard! Some of them had been eaten through by termites and just disintegrated in our hands.  The tiles that were still "in good condition" were ugly as all get out and were coming down!
 
 
Surprise - the insulation we were hoping to keep in tact was 1/4" thick...maybe an R value of .5? USELESS!


Surprise - the original exterior siding - lead paint and all!
 
No Photo Available.
 
Surprise - the carpet padding melted/disintegrated decades ago and now needs to be scraped from the subfloor with this beast:

 It's called a Goldblatt Floor Scraper. I'm pretty sure Mr.Steady picked it up at Lowe's.  It was insanely heavy, but it got the job done.  Something lighter with an exchangeable blade like our hand-held scraper might have been a better bet.


 Surprise - that's not sheetrock on the walls -it's 1/4" paneling!  A lot lighter to remove and dispose of, but that meant 1/4" lost around each room on the final design, so we had to keep that mind.
 
Just two days later (with some help from a young teenage body on loan from church) Mr. Steady had stripped the place clean! And after 5 trips to the dump and a pile of "possibly reusable materials" on the porch....we were staring at a hollow shell:

 
(FYI: that door leads to the garage which would be a crucial part of the final design, but we were still storing materials in there and couldn't begin the demo process out there yet).
 
 
All of the exterior walls were coming down and getting relocated, but we wanted to double check the ceiling rafters and the roof structure to be sure none of them were load bearing.
We started to get an idea of how the layout would work. In fact, after all that labor (and the sudden added cost of insulation) we decided to reconfigure the bedroom to save some time/money on moving the existing windows. Besides, we needed new calculations for the room size with the 1/5" sheetrock adjustment...... So, back to Sweet Home!
 
THE FRAMING
 
Don't miss the next installment of the In-Law Apartment series....Subscribe HERE (or scroll NE until you find the email subscription box just below the stunning photo of your favorite author! =)


Tuesday, April 11, 2017

DIY: Converting the Garage - Building an In-Law Apartment From Scratch

 
 Up until this point, most of the work had been carried out without disturbing the garage area. We were still storing some things there that we hadn't moved/sold yet, namely a gigantic china hutch we called "The Beast" that wouldn't fit through any other doorway.  We tried our best to work around it.


We brought materials and tools through the garage door and locked it securely at night.  But, there came a day when we knew it was now or never. We had sold "The Beast", the weather was right, and someone was on their way to remove and retrieve the garage door/opener. 
 
 
We quickly framed a wall, using a powder-actuated nail gun to secure it to the concrete slab. 
This was a defining moment because this was the location for the new front door - the official entry to the new apartment. But, first we had to seal it.


Rather than buying "house wrap" as a weather insulator, we were offered a large panel of "wood wrap" (an almost identical material the lumber yards use to protect the lumber during transportation) for free. Sold!
 
The window and doorway were trimmed out and secured with flashing tape. That stuff doesn't joke around! It is STICKY!


Then, we installed the window in place - and just for fun, opened it and had a little chat from either side to get a feel for it. So great!

 
And then....the door. A front door! This was the big moment! It was officially a home. Not just a wing on the side of a home. But, it's very own home.

 
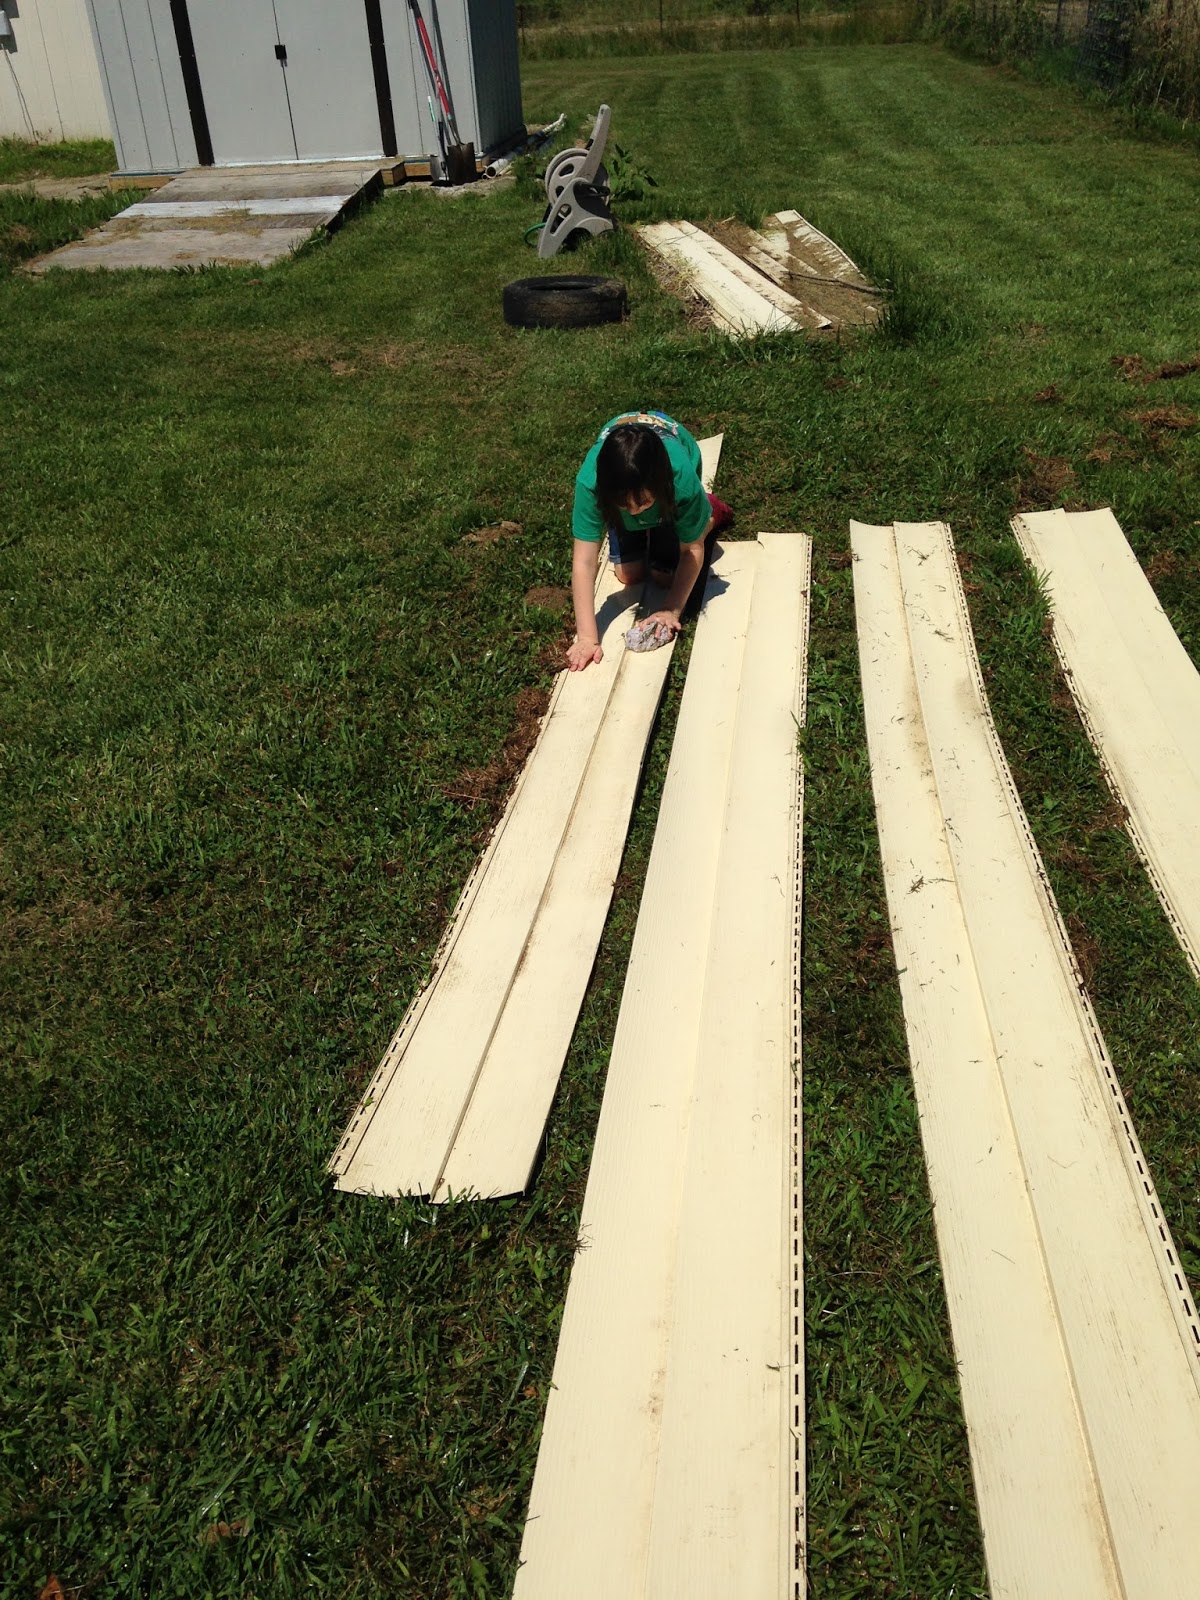
Not too pretty yet, but still very official. We had some extra pieces of siding that were behind the shed when we first moved in. We set the dingy old pieces out on the lawn and set our Curious Cowgirl to work with a bucket of soapy water.


Meanwhile, Mr. Steady trimmed the door out - wow! Starting to come together...

 
And the last of the siding is in place....

 
Ta-da! All in a day's work!
Neighbors who have driven past this house for decades were blown away to cruise by and see this. Didn't that used to be a garage door? Am I losing my mind?

 
I just LOVE a good before and after!


We'd love to hear your questions, thoughts, and comments!
 
From our home to yours,
Katie
 
 
This post contains affiliate links. To learn more, please click here.

Tuesday, December 13, 2016

DIY: Ceiling Beam - Building an In-Law Apartment from Scratch


Our first MAJOR snag in the renovation: We pulled the rickety patchwork plywood pieces from the ceiling in the former garage (future living room) to find the joists drooping - a lot (2.5").  The center support joist was a 1x10 (drastically undersized for the 15 foot load it was carrying) and some of the lateral joists were attached with a single nail. Knowing that this part of the structure was originally constructed in the 90s and was not sagging from age, but rather from poor craftsmanship (and apparently really bad math) was aggravating at best.  Reframing the ceiling was definitely not in the original budget or time frame, but something had to be done.

 
We got some advice from a local guy who was familiar with structural loads and decided on a home made LVL. Not cheap or easy, but certainly cheaper and easier than reframing it all from scratch. So, after several days of rigorous calculations and painful design decisions, Mr. Steady gathered (2) 2x12s and a sheet of 3/4" plywood and sandwiched them together to make one massive - and insanely heavy beam. 

 
  So heavy, in fact, that we had to hire some muscle to get in place.  Mr. Steady wedged a 4x4 under the original ceiling joist to lift it to the correct (and level) height (a creaky, terrifying experience in itself) and everyone quickly took their places for the new beam installation:

  • Three sturdy ladders
  • Three sturdy young men
  • 2 heavy duty rafter hangers
  • 3 hammers
  • Hundreds of nails
  • Lots of upper body strength
  • and 1 nervous photographer behind the camera
  • ....Oh, and my father-in-law pacing around making wise cracks about the ceiling caving in (oh so helpful)...

 
After all the heaving and the hammering was finished, everyone stepped back. We pulled the 4x4 brace away and held our breath.

 
Ta-da! 
 
 
The new center beam sits almost on center in the room. The original one was off by about 18" - don't ask! We still had a long journey ahead of us....but at least we didn't have a health hazard above us.
Onward....
 
Please leave your comments, questions, and thoughts below. Love to hear from you!


Don't miss the next installment of the In-Law Apartment series....Subscribe HERE or in the top right hand side of your screen - just below the stunning photo of your favorite author! =)

From our home to yours,
Katie