Tuesday, February 24, 2015

Family Bonding - Socializing Our Chickens

 
As homeschool parents, we have been warned time and time again about the desperate necessity of "socializing".  So, for the sake of being "well-rounded", we have gone to great lengths to ensure our daughter's social skills, etiquette, and language skills have not suffered for her lack of public education.
As a result, while her father and I (both public-schooled) could easily be labeled "antisocial" for our homebody tendencies, our daughter has made fast friends with the local librarians, shopkeepers, and neighbors. Not one vehicle drives past our house without getting a hardy wave from our very social little homeschooler. Even the gravel trucks blow their horns for her. 
So, when it came to socializing our new flock, we figured we should leave it up to the pro. 

Although we'd like to socialize all the chickens, it's tough not knowing which ones will end up in the freezer when the whole gender reveal finally takes place.  So, right now we're focusing on the Buff Orpingtons (because they are mellow and easy to catch) and the Barred Rocks (because they are still young...and easy to catch).

Here is our very precise method:
1. Pull 1 or 2 birds out at a time to be sure they get lots of 1 on 1 attention during the bonding session.
2. Hand the birds over to our daughter and let her do her thing (supervised, of course).
 
Here are some instructional photos:
Feeling her beak, her comb, her eyeball, each feather...

Tickling, petting, patting, and snuggling....


Trying to feed her a wood shaving she found on the floor...
So, it seems that socializing birds (according to our five year old) involves a lot picking up, putting down, chasing, holding, cooing, petting, singing, hugging, snugging, feeding, and lots more picking up and putting down.  Good times.
It is also essential (according to our five year old) that all parties participate -even the four legged ones.  This forced participation is especially important when the little Barred Rock is cold...and cheeping incessantly...at deafening decibels....and needs to be wrapped like a baby in a blanket....and snuggle.

And if your dog can tolerate the screeching baby Barred Rock in her ear....she is ready for a more intense bonding experience.....like a baby Buff jumping on her back and balancing like a circus performer.


Such thorough bonding sessions have proved to be very beneficial...
These two are now BFFs.

All kidding aside, it made a difference right away. The chickens that we "socialized" are more prone to approaching us, as the others still run for their lives every time we reach for their water dish. Without the influence of the mob-mentality (fueled by the spastic Ameraucanas), the Buffs and Barreds seemed to enjoy being handled.  It's pretty fun playing Mama hen and watching them learn to trust us.
 
We'll keep you posted on our progress.


Monday, February 23, 2015

5 Week Chicken Update - A Whole New Flock


Well, we're at the 5 week mark, and this gawky cackling brood is a far cry from the fuzzy little chickie babies of yester-month.  Its like having a whole new flock.  Especially the Ameracaunas.  They seem to change drastically from day to day.  And there is quite a variety of color developing as their wings come in.  Looking back there was really no way to predict their coloring. 
 

This snow owl colored one with these dark black legs actually began as this funny little penguin fellow:


Those colorful mystery birds...golden eagles, night hawks, and ostriches? Nope...Ameraucanas.

 The two Rhode Island Reds (pictured in the top left of this little chickie pile) are the funniest looking of all. Their head feathers haven't filled out like the rest of their body and they look like redheads with blonde roots.  They have also lost their pushy personalities, possibly because they've been outranked in size by most of the other birds. I thought Rhode Islands were supposed to be a pretty good size breed...wonder if they're runts?
 
Speaking of runts, there is still quite a size difference between the Barred Rocks and everyone else. Guess a week and half is pretty serious in the chicken world.


These two are the only birds that have caught on to the roosting pole fad.  That plump little squat really makes them look like little hens. Cute.
 
A few lessons learned (the hard way):
1. We ditched the cardboard "brooder" about 2 days after we set it up and my husband built a full size chick kingdom out of scrap plywood (more pictures and info here). It wasn't long before they started hoping over the sides of that and we added an additional barrier with old wire shelves we had in a pile out back. (chicken wire or wooden rails would work too).  The total height was brought to 24".
Very shortly after that, they developed their flight wings and...you guessed it.  Our daughter went out to the garage to get a package of paper towels and found a Rhode Island Red roosting on her bicycle. We used some bird netting we had set aside for the blueberry plants to cover the whole brooder. A little more hassle for feeding/watering/cleaning, but better than finding the flock strewn about the garage!
2. We were washing out the food and water dishes a hundred times (okay, maybe 3 or 4) a day because they would kick all the wood shavings in to them and tip them over.  We finally smartened up and elevated them a few inches up on a platform - they stayed a lot cleaner for a lot longer!
 
3.We replaced the 1 quart water dishes with the 1 gallon waterer. Definitely should have gone with that from the start. 
Overall, we are enjoying the process a lot. Each week brings a new set of behaviors to observe, problems to solve, and plumage to admire.  We're still loving our little flock...and learning as we go.
 
Any lessons you learned "the hard way" when starting out with your first flock?


Winter 2015 - Meeting the Neighbors


We have seen an unbelievable amount of wildlife during the last week...in our very own yard!  It seems this winter storm has brought many out from their winter hiding, both furry, and feathered alike.


Not pictured here are the two "extra special" visitors we encountered this week:  A baby skunk that tried to casually stroll into the workshop and the dead vole that our beloved family dog brought to the back door. Yum. 
 
All in all, it has been a delight to spot some movement out in that frigid, lifeless landscape.  Such a blessing to behold such beauty in our own backyard.

Meeting Winter 2015 - Bundling Up and Hunkering Down

 
I'm from Palm Springs. I grew up knowing Summers that lasted 10 months out of the year. Heat stroke, dust storms, and sunburns were all too familiar.  It was almost 100 degrees on our wedding day - in DECEMBER!  Good ole Summer...I know you well.  And yet, I'd been told there were other seasons....seasons with colorful leaves, blooming flowers, and rain showers.  Those seasons sounded so alluring.  My husband and I moved to Houston in 2007 and I finally experienced Fall and Spring (in a Houston kind of way). These seasons were so new to me and I loved them! But, at 32 years old, I had still never met Winter. Before our move to TN I had never seen snow fall.  Winter was the elusive season I had only seen in Thomas Kincaid paintings and Holiday cards.  Winter was that season that the old books described as a time of "bundling up" and "hunkering down" until Spring.  It seemed like such a peaceful time of planning, reflection, and togetherness.  
Moving to TN, I knew I would finally have my chance.  So, when we got 1/2" of snow in November I jumped up and down like a little school girl and ran out to take pictures.  But, that wasn't really Winter.  We got another dusting in January, but that wasn't really Winter.  We had some warm spells as we charged through February and I started to lose hope. But, just as I pulled out my potting soil and seeds to prepare for the spring garden, Winter arrived.
And it really is lovely!


Now that I've experienced "hunkering down" after a snow storm and waiting for the roads to thaw, "bundling up" next to the heater after a mad dash to the mailbox and back, building a snowman with my daughter, dodging snowballs from my husband, dreaming of a spring garden as the snow buries our field, hanging blankets in the doorways to keep the warm air from floating away, sliding across the front yard in my crocs, and digging out the back porch steps for the dog, I have to say: Winter, I'm so very glad to have met you.

"To every thing there is a season, and a time to every purpose under the heaven..." Ecclesiastes 3:1


PPScripture Lullabies - Healing Scripture and Peaceful Music for Young and Old - Hidden in My Heart volume 1, 2, and 3.


This post contains affiliate links.
 
I know lullabies are for babies and our mature, discerning ears should be interested in more "grown up music".    But, this grown-up has found a CD set that has completely redefined my appreciation for music.  These powerful songs have brought peace in my life, empowered me to stronger faith, and eased my soul during times of distress, unbelief, and fear....and yes, they're lullabies.

I know God's Word has the power to heal, to encourage, to enlighten, and to strengthen our hearts.  But, we don't always have the courage, the access, or the strength to read it.  These songs have helped me in those times. When my mind needed renewing and my heart needed soothing.  

Here is a brief description of the three volumes available:


Vol. I
This cd was given to me as a gift. I immediately melted in to the soothing ballads. This volume as a whole reveals how God relates to us as a Father. The song titled "I Will Never Leave You" portrays God's loyalty in such a personal way.  The lyrics begin: "When your sky is cold and lonely and your heart is filled with fear..." Who hasn't been there? I think we've all fallen in to a desperation that only God's peace can conquer.  This song brought that peace...and still does each time I hear it.
The song titled "Love Is" really brought me to a new revelation about God's character.  A very obvious revelation that I probably shouldn't admit I had overlooked for so long:  God is Love.  So, 1 Corinthians 13 is a description of God. I know - duh! I can be a little slow, sometimes.  Understanding WHO God is has brought more peace in my life than any other truth. Hearing His promises over and over is a priceless blessing.


Vol. 2
I bought this cd as soon as I found out it existed.  I was so pleased with the first one - and already wearing it out - I couldn't wait to hear 12 new songs. And I WAS NOT disappointed! Another beautiful collection of hope-filled music. This volume is a beautiful portrayal of how God relates to us as our Creator. I have learned to adore each song for it's own particular beauty during different times of struggle. Like when I thought my cd player might give up on me after the 16th round of "Everything is Possible."  But, it held out. And so did I - thanks to the comforting truth of God's Word.  When we were expecting our youngest daughter, I would play "Wonderfully Made" to bring me back to a place of appreciation and awe of the life within me when there was nothing else to appreciate about my 3rd trimester aches and pains. And now we play it for her during her nap time!


Vol. 3
This volume has a different feel to it.  It is wholly focused on how God relates to us as our Savoir -through Jesus. The songs are a reflection of Christ's life, His sacrifices, and the power of His love.  The song titled "By His Name" is a great spiritual weapon to wield in times of doubt.  Songs like "Let Not Your Heart Be Troubled" and "All For Us" have the perfect melodic beat to lull you to sleep...every time!  Don't play these songs in the car unless you've filled up on caffeine. They are THAT calming.  Like a warm blanket, a comfy chair, or a massage....for your heart.

If my heart felt adoration isn't enough to convince you to get your hands on one of these musical gems ASAP....I'd like you to know that the creators of this beautiful collection *donate 1 cd to a pregnancy resource center for every 10 cds sold! So, not only can you soothe your soul with these powerful tunes, you can be a part of sharing them with others. (*You don't have to purchase 10 cds, but they do make great gifts!) 

When I find a blessing like this, I can't help but share with all who will hear. These songs are beautifully sung, and professionally recorded. But, there is a power behind them that is supernatural. As God's Word is carefully tuned to music, an unexplainable peace is broadcast in every note.  I can't explain it. It's really something you'll want to experience yourself:


Honestly, if you want one, you may as well just order two. They make GREAT gifts for baby showers, holiday gift exchanges, Mother's day, birthdays, and just because. We all know someone who could benefit from some peace and comfort in their lives. 
FYI:  Expectant mothers will smile sweetly when they pull this cd out of the fancy blue or pink wrapping and thank you politely....but after days of sleep depravation, when they tear through the pile of baby gifts at midnight and finally unwrap this miracle-maker and lull that baby to sleep....they will call you...and thank you again...and probably cry a little. I know, because I started giving these things out like candy as soon as I learned of them.  I wish our family would have encountered them a lot sooner.
I hope you find a great blessing in these, as we have!

Thursday, February 5, 2015

Farm Shelves For Your Country Kitchen - A DIY Project


This post contains affiliate links. 
 
 I have been very eager to share these pictures with you. This project made an immense impact in our kitchen -both in visual appeal and in added storage space. These shelves are a grand milestone for our family. They mark the path where we crossed over from "building a kitchen" to "having a kitchen".
 
With all the mess and chaos of remodeling, I lost sight of my vision for a while. My dream of a cozy country kitchen was a faint memory as I walked across bare floor joists, just yearning for a place to boil water. Decorative whims really take a backseat in such a time of desperation (read about our "indoor camping adventure here).  So, when the floor was finally finished and it came time to piece the room back together, I wasn't in a particularly creative mood.  It was a mad dash of measurements, logistics, and prayer. 
For a few weeks we were so pleased to have a place to chop, simmer, sauté, bake, and broil (praise the Lord!), we hardly noticed what a bland space I had concocted. 
 
 
Although we adore the functionality of the kitchen, it needed the warmth of color, the charm of  personal touches, and more storage!  So, I skimmed through google images to find a starting off point then sketched some ideas for my husband.  Before I knew it, he came back from the shop with these:
 
 
It's a little hard to envision at this point, but trust me, these simple *rustic* brackets could be your best friend. You could stain them, paint them, distress them....you could alter them for a chunkier or more slender profile...or you could ask your husband to miter the edges so they look like this....


That's what I did...and I LOVE THEM.
 
This project was so simple. We are hoping to use this process to add shelving in several rooms in the house (once we get that far down on the To-Do list), namely the bathrooms, the craft room, and possibly the dining room. So simple and versatile! And cheap - yay for cheap!
 
My husband collected all the leftover bits and pieces he had laying around in the shop to build the brackets and we just used pine deck board (at $ .70 a board foot) from our local lumber yard for the shelves. We definitely came in under $50 for the whole project. 
 
 If you're looking for a supply list, here's a rough estimate of the project supplies for (3) 72" shelves:
(2) 2'x2'x8's -for the "L" shaped pieces. 
(1) 1'x3'x8' -for the angled pieces.
(18) 1.75" screws - to attach the corner of the "L"
(36) 1.5" finish nails -to attach the angled sections
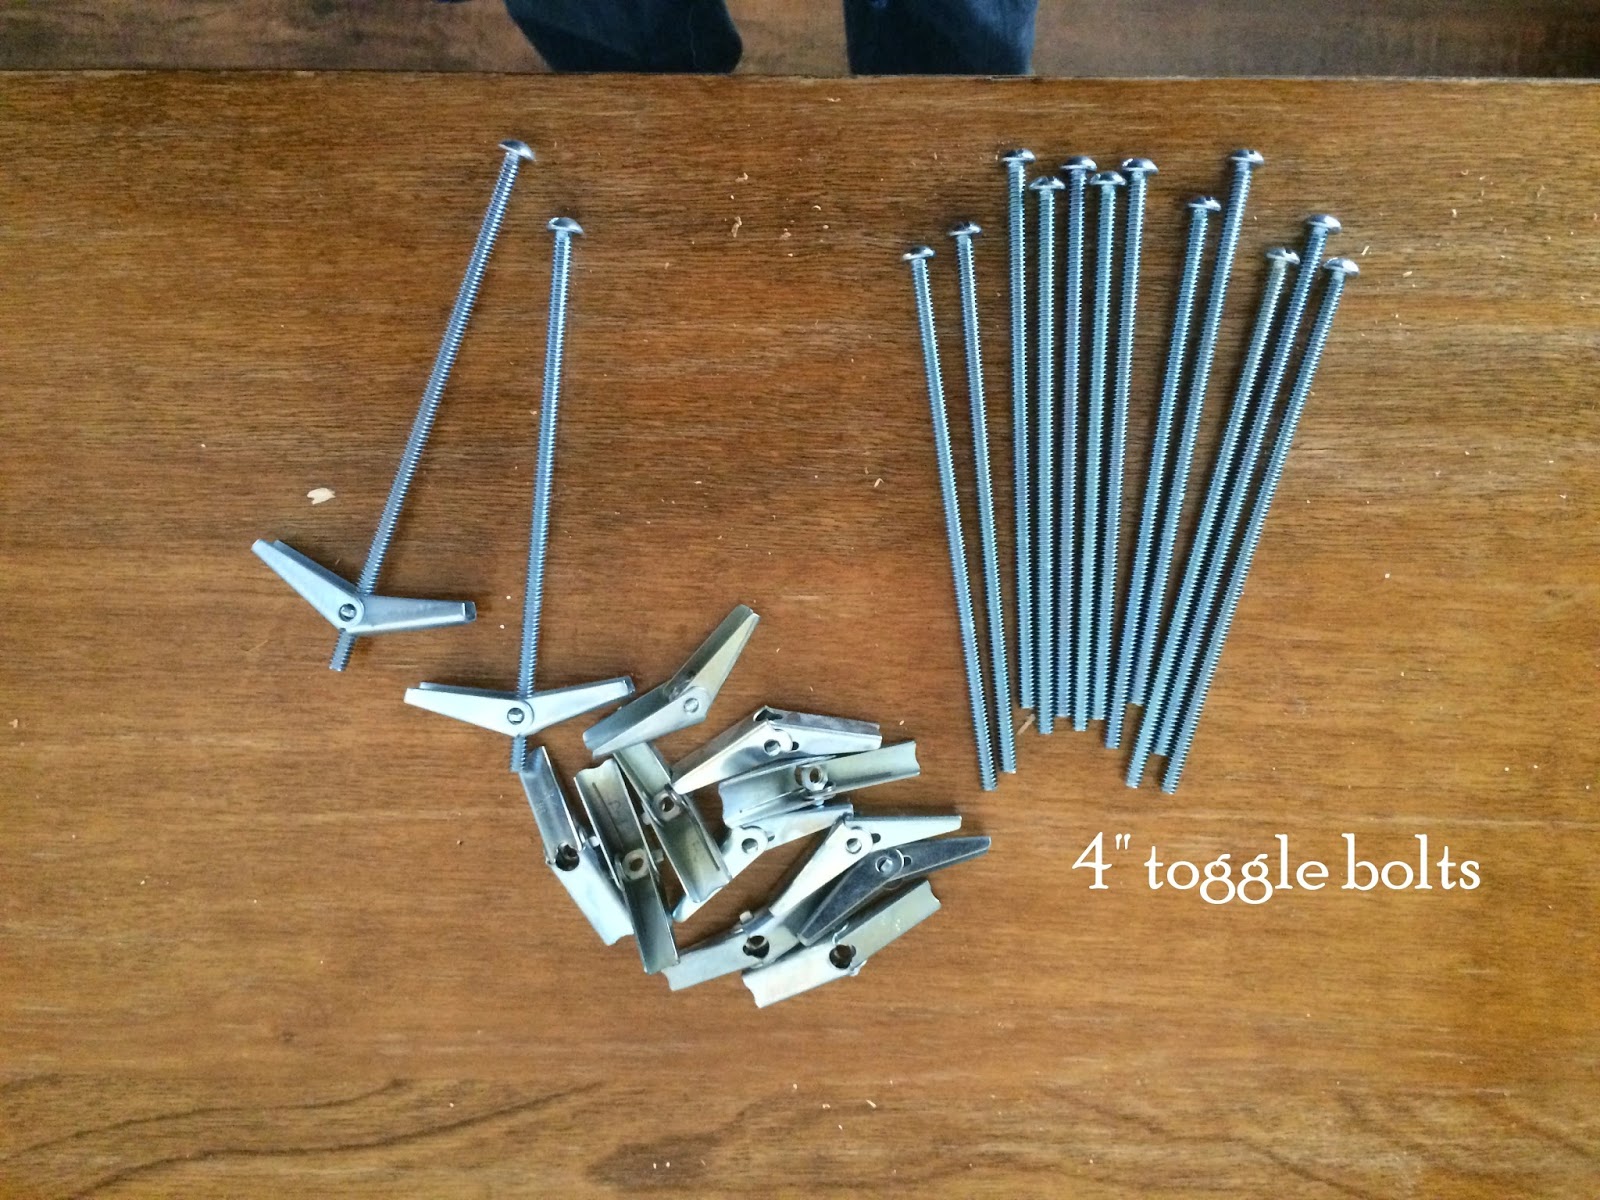
(18) 4" toggle bolts -to attach brackets to the wall (unless your brackets line up on studs)
(3) 1'x12'x6' boards - for the shelves
hammer
drill
Kreg Jig (optional)
 
And here's how the project went (I forgot to take pictures on steps 1-4 - sorry!):
 
 
Step 1: Cut all your bracket pieces to the dimensions of your shelf (sizes vary by project)
Step 2: Assemble "L" brackets
Step 3: Hold angled bar in place on your "L" and predrill holes for your nails.
Step 4: Remove angled bars and keep aside.
Step 5: Measure your wall to find the location of your brackets and predrill straight through the brackets and the wall for your toggle bolts.
 
 
Step 6: Insert toggle bolt through hole in bracket and place toggle brace (facing back toward you) on the end and screw it on about 1/3 of the way.
Step 7: Once both toggles (on one bracket) are in place, slide them together in to the predrilled holes and screw in to place.
 
https://www.amazon.com/Hillman-Group-372518-Toggle-4-Inch/dp/B000DCORHC/ref=as_li_ss_tl?ie=UTF8&qid=1477406556&sr=8-14&keywords=toggle+bolts&linkCode=ll1&tag=r06336-20&linkId=15b25631bac1f88fdd0820777682dc96
 
Step 8: Repeat this process, being sure to keep your brackets level with each other (I recommend using a 48" level here, but we improvised with a straight-ish piece of metal and a 12" level).
 
 
Step 9: Tape around your brackets and paint the wall. *This step can be avoided if you don't get so excited to put shelves up that you forget to paint the wall before getting started! =)
 
 
Step 10: Place your shelves on the brackets and marvel at the beauty of them!
 
 
Step 11: Marvel a little more....sooo pretty.
 
 
Step 12: Dig out the box of treasures you found in the attic when you moved in to your old farmhouse to display on your new shelves. Fun fun!
 
 
Step 13: Fill your shelves up!

 
Step 14: Celebrate a dream fulfilled.